Sunday, August 30, 2015

TBT: Butterick 3640 Does the 1770s ("Esmerelda", 2004)

I made this gown in 2004 for Hallowe'en. It is, in fact, directly responsible for me failing my third NaNoWriMo attempt (it was my second and last loss; I've won every year since then). I took some pictures of the construction process, inspired at the time by sites like Koshka-the-Cat. Most of them really aren't worth sharing, so I won't ;)


For a commercial pattern (now out of print), this one makes a decent costume. It would need a lot of work to make it historically accurate, but for a new seamstress, it was challenging enough and produced a lovely outfit. I'd learned to sew when I was 13-14 years old, but I didn't enjoy it at all, and I gave it up just a few years later. I made a project here and there over the years, nothing that was ever finished or wearable. I loved historical fashions, and the few bloggers who were out there uploading their creations pre-blogging days, but so many of them self-drafted (how do I math??) or used one of the few independent pattern companies out there, pattern companies that rarely shipped to Canada, and if they did, charged an arm and a leg to ship it. As well, at the time I didn't have a credit card and PayPal had not quite opened to Canadian clients yet, so I was super happy that a commercial pattern, that I could walk into any fabric store and buy, had something that looked like it would work. So, I eventually invested in some fabric, a nice embroidered linen, and made up my gown.

Can I hear a HUZZAH for the advancement of the internet, more patterns and research available, and ease-of-access to things that we didn't have 10 years ago? HUZZAH!

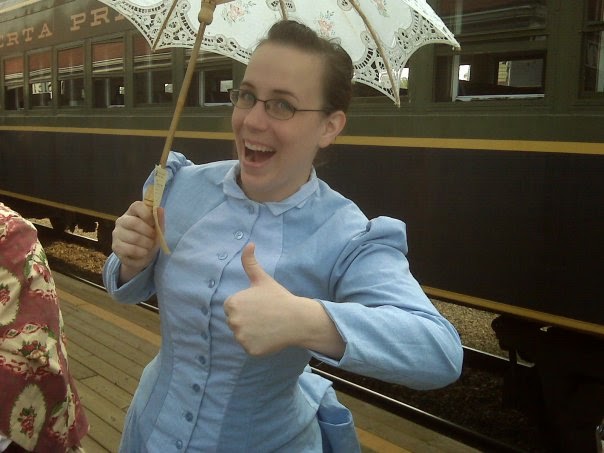
It took a long time to pleat the skirts, but pleating guide helped a lot. Each pleat is stitched for a couple inches. I did use the netting in the skirt but if I ever make this again (with some other adjustments), I will leave it out. You can see that I used white or cream fabric for lining the bodice, and black for the sleeves. As I recall, I did fit the lining in the white fabric (probably cotton) before deciding to cut the fashion fabric and then just used it as lining. The bodice closes with hooks and eyes. As I recall, the pattern directs you to sew on hooks and make thread loops; I opted to use hook and eye tape. I didn't have a lot of luck with it, it gapped a lot and pulled. As I didn't know any better, I didn't make or wear any undergarments. I would absolutely do so now. Since I am not a standard size, I fit the bodice to my bust measurement and fudged the waist, and was terrified of the bodice ripping open during the two nights that I wore it. A set of stays will do the work of holding the body in the correct shape and save the gown itself the stress of doing so. And, as this gown is very low cut, a shift and perhaps some trim would definitely help hide a tiiiiny bit more skin ;)

Other than that, and the laundry list of changes to make to make it more historically accurate (and really, once you get into changing the armscyes and sleeves, you might as well just get a historically accurate pattern), this pattern went together easily and created a really lovely garment! I dubbed her "Esmerelda" and only wore her twice. I had her in my closet for many years and finally sold her last year when I realized that I would never do so again.

Friday, July 24, 2015

Meet Beatrice & Farewell Grampa

Hi everyone! I'm sorry I've been so bad at blogging recently. I did finish my gown, but it's been far too hot to take proper pictures of it, and then I had some personal things pop up that have been eating all of my spare energy. So this post is about a month in the making.

One of these days I might end up with a whole page dedicated to the things I have in my sewing area, which is, at the moment, most of my living room. There's so many lovely items! Last summer my life-partner gifted me a vintage adjustable dress form whom I promptly named Josephine. I have 2 sewing desks (one of which was built by my grampa), a foam mannequin, a lovely Rowenta iron, three sewing machines and a serger. Right now I live in a small two-room apartment (that I'm very certain used to be a single room) and I just have far too many things in general.

The sewing desk my grampa built. Unsure of when, but the original picture was taken at least after 1981.

A photo posted by Crystal Yoner (@totchipanda) on


But not sewing things. One cannot have too many sewing things when one's main hobby is sewing.

A friend of mine recently offered up her sewing machine free to a good home. She'd purchased it second-hand in 1976 and it's been well-loved and well-looked after, but she just didn't need it or use it anymore. It goes forwards and backwards, she said, and that's it. She later found a zipper foot attachment and also offered up a sewing box. I happened to see the post within minutes of her posting it, and quickly snatched both up, which I then picked up a few days later. I hadn't really noticed a lot of details from the picture she'd shared, just that it was an older Singer machine. I was really excited to pick it up, and even more excited once I actually had. I knew right away that she had a real treasure.

Meet Beatrice. She is a #singer #sewingmachine manufactured in 1956 <3

A photo posted by Crystal Yoner (@totchipanda) on


Once I got her home, I unfortunately had to run out the door again so it was several hours before I got to sit down and examine her. I intended to find something on the internet that would help me identify what kind of machine she was, but first I had to locate some key features! Some of the immediate features I noticed were the side-mounted bobbin winder (a feature I've never used! My machines have always had top-winders), separate plugs for the power cord and foot pedal, and a side-loading bobbin case. I didn't really notice the model number on a plate on the front. I googled some keywords and immediately found a helpful database of Singer serial numbers. It took a few minutes to find the serial number on the machine, but I finally found it imprinted on the bottom. It had a double-letter start, so into the appropriate database and...

Oh my.

Oh myyyyy. According to the database, my lovely new friend was manufactured in 1956. That makes her older than my dad, and almost as old as my mum as to make very little difference. I could hardly believe how lucky I was.

Beatrice is a Singer 301A in two-tone beige. She's not black and gold and she doesn't have any decals, and as near as I can tell she's as basic a machine as she ever came, and I am still so thrilled.

The next day I googled a manual, and I'm glad I did. It's been 10 years since I needed to loosen the flywheel in order to wind the bobbin, and I had completely forgotten that that was a thing. Bobbin winding was definitely a mystery. The bobbin is loaded slightly differently from my current machine, and I got the overview on the mechanics and things like where to oil it. Also of interest was some tips on embroidering fabric, special feet (like a bias tape applier!), and perhaps most interestingly, a somewhat offhand comment about using it on a cabinet table. A cabinet table like the one currently sitting in the corner of my living room.

I'm currently in the process of trying to downsize a few things so that I can rearrange my sewing desks, now that the one my grampa built has come back to me. Right now Beatrice and Janome both live on the kitchen on the table with the serger. I've been using Beatrice pretty much exclusively for my recently completed projects, both the 1840s dress and a 1910s corset, and I am so in love. She sews like she was made by angels. She's had a tiny bit of a learning curve, namely in winding the bobbin, of which I only have one, and discovering how the lever on the side controls the stitch length. The most interesting part is that the foot pedal is more of a box with a button, rather than a pedal. I usually sew barefoot, especially in summer (did I mention it's been really really hot?), so that's a bit strange-feeling using only one toe. Interestingly, on a day that wasn't as hot, I was wearing slippers, and the flexible sole made the button operate more like a pedal.

Welcome home, Beatrice. Welcome home.


-----------

Friends, I am very sad to say that my grampa passed away on July 23. I was very close to him, and I am very saddened by his passing. He was responsible for so much good in my life, and I am still in disbelief that he is gone. But gone he is, and with upcoming cons and trips, I won't have much time or energy for blogging. So I am going on a writing/sharing hiatus. I will still be reading, so I hope to see all of the lovely things you've been working on.

Wednesday, June 24, 2015

1840s Dress Part 2

Phew, this gown is taking a really long time! I've been really excited to work on it all month and I have been whenever I've had free time, which has been little and far between. But I've got the bodice finished except for closures and sleeves. The sleeves are generally assembled, and once those are done and making friends with the bodice, it'll be time for the skirts, and then just attach the two and poof! I'm so excited :)

I won't say a lot about this right now. I made the bias tape for the piping out of 17" of 60" wide poly taffeta I had in my stash that was the most perfect colour, and matching cotton yarn also from my stash. It is pretty much all applied by hand since I can't get my zipper foot close enough to the piping. The true colour is more a deep burgundy; I took these pictures fairly late in the day when my east-facing apartment is not well-lit, but I so wanted to share my progress. I just LOVE this dress so far. I'm working on the gathered middle part of the other sleeve as you read this :)


Thursday, June 18, 2015

Sisterhood of the World Blogger Award

Oh goodness, what a lovely thing to log on and see that the wonderful Gina has chosen to gift me a blog award :) Urk, that sounds so self-centered and I promise I don't mean it like that! Gina is such a lovely blogger, and I am so grateful that she also reads my blog. Thank you Gina! Please do visit her blog, Beauty From Ashes!


Official Award Rules:
1.Thank the blogger who nominated you, linking back to their site
2.Put the Award logo on your blog.
3.Answer the ten questions sent to you.
4.Make up ten new questions for your nominees to answer
5.Nominate ten blogs.

I'm going to do it a bit out of order too :)

My nominees are:

1. Asa @ Fashion Through History
2. Nessa @ Sewing Empire
3. Tina @ Tarnished Thimble
4. Tiana @ Adventures in Costuming
5. Vincent @ Mouse Borg Designs
6. Caroline @ Dressed in Time
7. Amelia @ Crafty Wench Costumes
8. Jeanette @ The Perfect Touch
9. Glennis @ The Modish Victorian
10. Peryn @ Isobel Northwode Costumes

My questions:

1. Why is your blog named what it is?
2. What made you decide to start blogging?
3. What do you enjoy most about blogging?
4. On average, how much time do you spend sewing?
5. Of your favourite eras, do you prefer having patterns pre-made or making your own?
6. Speaking of favourite eras, which one is yours and why?
7. What is the most unconventional object used in a previous project? (Either in the making of, or actually in the item)
8. Describe your ideal sewing area.
9. Care to share your favourite sewing tip/trick?
10. Coffee or tea? Plain or doctored?

And my answers:

1. What do you watch/listen to while sewing?

Movies, mostly. Neflix has been a great boon in my life, just a few button pushes and boom, hours of entertainment!

2. What costume/outfit has filled you with them most sense of accomplishment and joy?

Most recently, my sari ballgown :) I was so happy to use the sari, given to me almost 10 years ago, and turn it into something so lovely and was such a joy to wear.

3. What is your favorite fabric/trim/embellishment to work with when making an outfit?

For fabric, I've come to enjoy working with natural fibres. I haven't quite made the leap into trim or embellishment yet, beyond the occasional foray into bias tape ;)

4. Do you take a lunch/food break while sewing or sew right on through the hunger?

I try to make time for food breaks. Not eating has a long history for me of directly leading to migraines, which is much less conducive to sewing than taking half an hour to eat would be. It's still hard sometimes, just one more seam! Having to plan and make my own meals is legit my least favourite thing about living alone ;)

5. Would you rather read something Sci-Fi or a historical/classics novel?

I generally prefer sci-fi/fantasy. One of the things my brain struggles with is word-flow/speech patterns. Historical language (Shakespeare right up to oh, mid-20th-century) is very difficult for me. I can read it, and as soon as I stop, I have no idea what I just read.

6. When going out to eat at a restaurant, do you like to sit outside in the fresh air or inside the restaurant?

Patios all the way! (provided there is adequate sun-blockage. I am very pale. Random strangers on the bus have commented on my ability to turn lobster red in a short period of time)

7. What has been your most favorite historical place to visit?

I haven't been to too many, but the Alamo in San Antonio was very special. I stood in the room that the women and children had hidden in and inside the main room and pictured the events happening around me, and it was like I could feel history breathing through the walls. I'm glad I went.

8. What fills you with awe and wonder when you gaze upon it and why?

Gosh, where do I begin? There's so much to nature that I could wax rhapsodic for days (do you want to hear about the birds that live in the GINORMOUS TREE outside my apartment? How my cat tried to catch them one morning, from the wrong side of a closed widow? Summer thunderstorms? Driving in the countryside and also following the hills and valleys and thinking how once upon a time, all of this was underwater, and wondering what it looked like before roads and Europeans?), and sometimes I'll be sitting in my car and filled with awe at the scope of human invention and our ability to learn and adapt and create.

About once a week I'm still amazed that I both know how and am able to drive, taking me places around my city and province that would otherwise be very limited to me. I am so grateful every day to be where I am, even on the days when it's hard to appreciate :)

9. If you could take a time machine and visit a certain time, what era/eras would those be?

First I think I would go see what dinosaurs were really like, and then I might pop in and out of various time periods to see what those were really like :) Basically, the Doctor just needs to come get me, I'm ready any time!

10. Do you prefer to go barefoot or shod on the cool summer grass? Have you ever noticed that no matter how hot it is, that grass is always cool?

Generally barefoot. I hate hate hate wearing socks and shoes, especially in summer! But sometimes one must wear shoes. My lawn was often dry and brown, or covered in thistles, or a miasma of mosquitos and/or dog poop. And yes, I have noticed the coolness of grass. I don't know why that is, but it sure is nice on a hot day to place your feet on cool grass :)

Tuesday, June 16, 2015

TBT: 1884 Cream Walking Gown (2011)


Fort Edmonton Park, 2011
Photo by B. Yoner
Dogs borrowed from a passerby.

2011

In May that year, I had gone out to get some fabric for another costume, and found some polyester silk-look fabric on sale for $2/m. TWO DOLLARS A METRE!! I promptly bought 10m of both cream and bronze, and went back for 1m of the third colourway (and wish I had bought more of all three, too). For that year's train trip, I made the bronze skirt first, the 4-gore (you're gonna see it a couple more times, too!), but I couldn't decide on a bodice style. So I started making a cream version. This time I managed to figure out the ruffle ratios, and I ADORE the look of them. I'd wanted to make TV's Wash Overskirt forever, so I finally took the opportunity to do so. The bodice is the French Vest, without a contrasting front vest. Some day I will put raspberry trim all over this puppy and make it fabulous!


Train from Stettler to Big Valley, AB, 2011
Photo by A. Elliot

This is one of my favourite outfits, despite some tweaks being needed. I need to remove the ruffle and rehem the skirt so that I don't need to wear 3" heels with it, and fix the fit of the bodice. This is where I first really noticed that the bodices would fit me well from the bust point down, and through the back, but the top of the chest seemed to have a "fallen souffle" look, where extra fabric just kind of... sat on top of my bust. We also discovered that by taking pictures in natural light filtered by a tree, my dress kind of... glows.


Big Valley, AB, 2011
Photo by A. Elliot

And of course, this is another one I was working on until the last minute. I had spent the day before the trip hand-sewing a hat while at my aunt's birthday BBQ, which took 8 hours, and since I hadn't figured out the use of a thimble, my fingers were so sore. I only managed to attach 16 buttons and gave up. The last 4 were sewn on in the car (again). The pleats on the back of the bodice were held in place with pin for a couple months, and the skirts still lack closures.


Big Valley, AB, 2011
Photos by A. Elliot

I wore this gown again in Reno for WorldCon/Renovation that year, and to a steampunk photoshoot at Fort Edmonton Park a couple months later. I was going to wear it on the train from Carson City to Virginia City in August 2011, and decided not to because my poor Canadian constitution is much more suited to surviving -40C/F than +40C! I so wish I had though, I would have looked right at home on their darling 1860s boardwalk!


Downtown Virgina City, NV, 2011

Friday, June 5, 2015

HSM '15: #6: Out of Your Comfort Zone: The 1840s (Part 1)

I was pretty excited for this challenge when it was announced. There is a lot of things in historical costuming that are out of my comfort zone! Where would I begin? The challenge description indicates a range of things to consider – a new era, new technique or skill. I had a range of options. My main era is the bustle years, but even within that there is a lot of things I've never done. My gowns are so very very plain, since I don't really think in terms of decorations. I could make a new gown and deck it out, or decorate something I've already made (which I do have plans for). The easiest would be to pick a new era – I thought maybe the 1830s, an era I have little interest in and quite frankly find intimidating, or maybe working on a proper 1893 outfit (looking at you, Doctor Who), and even now that I've started sewing for the late 1700s, there's still things in there that terrify me (like robe francaise, also on the "someday" list).

But rather than waffle forever, I'd decided relatively early before the challenge started, that I would make an 1840s day dress. There was a number of things about it that would be out of my comfort zone – a new era (inspired by the 2011 Jane Eyre, such lovely gowns!), new things to make (January's corded petticoat would be needed to go under this gown), and most importantly, a new technique, which was going to be my focus for this challenge. I plan to gauge the skirt by hand. The only other time I needed to gauge a skirt, I cheated and used some pre-threaded curtain tape, and it's really best if we just don't talk about that skirt for now. The other new-to-me technique will be using piping on the dress. I used piping for two other costumes in the last 10 years, with mediocre results. On one of them I gave up trying to feed the seams awkwardly through my machine with no adjustable zipper foot or a piping foot to help me, and set the piped sleeves in by hand (so much easier and less stressful!). I'm also considering potentially hand-sewing large portions of this dress, though I will likely construct some of the interior seams by machine.


Just adore this silhouette! (Image from Somewhere on the Internet)

My free time these days is very limited. I took on some shifts at my belly dance studio, and for the rest of June I'm dancing once a week too. That leaves me 2 evenings and 1.5 days to work on whatever it is I'm working on, including housework and other odds and ends. So I'm really quite pleased that on one of those free evenings I was full of desire to work on the dress!

I started by pulling out all of my related patterns – Butterick 5832, which is based off an extant dress. The line drawing shows a lovely shape but you can tell that the pattern picture's model is not wearing the right sorts of undergarments. (Burda's early-mid-century pattern picture is even more questionable. Cone-shaped hoops had been out of style for over 200 years!) I really liked the sleeves but I wasn't sure about the front drapery, and some people on a Facebook group I'm in opined than the bodice is cut too low (more on that in a bit). Here's where I started to waffle a bit. I looked at the diagrams in Period Costumes for Stage and Screen, The Cut of Women's Clothes, and Patterns of Fashion. I toyed with the idea of modifying a Truly Victorian bodice pattern. I compared line drawings from the books to Butterick's pattern. I googled "1840s day dress" and found some lovely examples, which led me to trawling Pinterest for an hour, and then looking at the Met's online collection for another hour, pinning more pretty dresses. I didn't even get through the whole collection, maybe the first 700 items or so (not all of them from the same time period, of course, just the same century). So much prettiness! I also went fabric-diving in my stash to see if a particular length of fabric I knew was in there was going to work for this dress, but even if it is, I don't have enough of it (4m). I did find another length (6m) that I had earmarked for this decade and forgotten about. Excellent!


My fabric looks a lot like the dress on the right.

In the end I decided to just stop waffling and use the Butterick pattern. I'd pulled the pieces for the lining out on Sunday so I already had the pattern for the mock-up ready. I cut it out and quickly sewed it up. The dress is back-opening, but for the purposes of fitting it on myself, I sewed the back closed along the seam-line and left the front open. As expected, I need to take length out of the shoulders. It fits great from bust-point to waist, where I will need to let out the darts a bit. By pulling the shoulders up 3/4", the neckline fits smooth and doesn't appear to be as low as it shows on the pattern envelope. I might need to move them back a little though, in memory they sit right on top of my shoulder. I also need open the armholes a bit; they were digging in at the front a little too much. Other than that, it's perfect. The neckline doesn't seem too low to me, either, though I didn't try it on with a shift. Even without one, this will be a cleavage-free gown.

Now I have more decisions to make, such as what to use as piping, (solid or self-fabric? If solid, what colour? Matching or contrast? What should I put in as the cord?), how much length I need in the skirt, how many petticoats I need to make, what kind of shift and chemisette to make, how much hand-sewing I want to do… So many things to decide!

Sunday, May 31, 2015

HSM '15: #5 Practicality: Regency Bodiced Petticoat


I had a few ideas of what to make for this challenge, and the one I had my heart most set on was an apron. I never used to use aprons, and in the last few years I've begun to really appreciate them. They're so useful! I put one on any time I'm in the kitchen -- for cooking (protects my clothes from food spills), for washing dishes (protects me from water splashes) -- and tuck a tea towel into the strings wrapped around my waist for convenient hand-wiping or spill-cleaning. I prefer ones with pockets -- sometimes I tuck my phone or a tool into the pocket when I want it handy. I hadn't quite decided on era, but aprons are so ubiquitous in historical contexts and are relatively simple to make, so I wasn't concerned about that.

Then, mid-month, my partner-in-crime and I attended another Regency ball. I haven't been wearing the proper underpinnings of late, having made the stays many years ago and finding them too small. While I sometimes rail against the size and shape of my chest, which makes fittings interesting when I have to take out 2-4" out of the chest, it's fairly ideal for Regency. I find I get a similar shape with a good push-up bra. I'm going to make some new stays, never fear, but, well, you folks know how it goes. It's on the list, it will be accomplished some day :)

After the ball, which was amazingly wonderful, partner-in-crime and I decided to get together for a sewing day, and we would make bodiced petticoats. She wanted to rework hers, and I wanted one in general, and bonus -- they're super practical. Perfect for this challenge!

I did go over the following weekend for sewing, but shortly after we got back from the ball, I came down with a plague. I don't know where I got it, but it knocked me flat for several days. I was sewing and she was helping me fit and all the time I could hardly breathe and she brought me a sandwich I could barely eat. It was just lovely lol. But we did watch 60 episodes of The Lizzie Bennett Diaries which is a clever modern adaptation of Pride & Prejudice, and I did go home with my bodice and skirts constructed. All I needed to do was attach them together, put buttons on, and hem it.

I used a polished cotton in an adorable star print that I got from my mum's stash. I can actually get it on by myself by buttoning it up and then wiggling into the armholes. It's just darling (if dangerously low-cut!) and I would totally wear it as a summer dress too! It's about as low as my calf, I cut it much too long at first (of course) and then put it on Josephine under my Stashbusting sari gown because it's the shortest gown I currently have, and I didn't want it to show. Josephine of course can't show the proper fit of this, since she is very much not squishy like I am :) I'm really happy to add this to my wardrobe!


Front is pulled in with a ribbon drawstring.


The back closes with vintage buttons.

The Challenge: #5 Practicality
Fabric: 100% cotton
Pattern: La Mode Bagatelle
Year: 1810s-ish
Notions: poly ribbon, vintage (plastic) buttons, poly thread.
How historically accurate is it?: I don't even want to consider this category today lol.
Hours to complete: 8 or so (complicated by death plague)
First worn: Not yet.
Total cost: Free-to-me! Stashed fabric, ribbon from other projects, salvaged buttons.

Wednesday, April 29, 2015

TBT: Blue 1884 Traveling Gown (2006-2009)

It's about time I started working on posts of my wardrobe :3 It's not nearly as large as I'd like it to be (maybe this is a good thing), but there's still some good staples. Like most of my projects, a lot of them were finished at the last minute so there isn't a lot of in-progress pictures, or commentary written. I'll fill in what and where I can!

Blue 1884 Traveling Gown

2006


The Phantom of the Opera was coming to town, and I eagerly decided that I want to make a costume to go see it in. My mum, aunt, and three sisters all decided that they needed to dress up as well, so we went as an interesting mix of Civil War, Victorian, and Victorian-inspired menswear (my aunt had a delicious opera cape). I remember making the ruffled overlay for the bustle while watching a movie in which the main character needed to stick his hand up a bull's butt, and working on undergarments with my then-new serger (tiny rolled hems!) and rolled-hem foot of the sewing machine (less successful...)


My bustle when it was shiny and new.

I did give up on the bodice, however, and wore a modern dress shirt. I was trying to put the supportive boning in and it was being irritating, so I put it aside.


"Look wistful!" my sister said...


Photo of us minus sister behind the camera, inside the theatre post-show.


Myself, 3 of my 4 sisters, and my mum :3

The skirt is Truly Victorian 261 4-Gore Underskirt with bouffant. Undergarments are TV's combos and wire bustle with ruffled overlay.

2009

The first year we went on Alberta Prairie Railway Excursion out of Stettler, AB, I again decided that I was going to wear a costume, I already had most of it ready! I pulled the bodice out and managed to finish it. Alas... nothing fit me very well. I had to lace the corset down to my many-lbs-lighter measurement because I didn't want to take the time and fuss with fitting it to my new figure, not to mention I didn't have time to get or make a new corset. It was fine for the first several hours, though I had somewhat sillily gotten dressed before my dad picked me up and then drove 2 hours in costume... By the time we started heading back to Stettler after our visit in Big Valley, I couldn't take it any longer and had to change back into my normal clothes. My mum was the only one who dressed up with me that year.


Mum and me!

The bodice is TV 462 French Vest bodice.

I wore the dress one other time, in 2010, again having to take it off early because I wasn't feeling very well and the compression from the corset was very unpleasant and wasn't helping. I've not worn it since. I should probably sell it, least of all because it just doesn't fit anymore.


One of my favourite photos, ever. Photo by B. Yoner.

Friday, April 24, 2015

HSM '15 #3: Stashbusting! The Sari Ballgown

Hi friends! It's been a long long time since I posted anything here, I'm sorry! This winter just kinda... happened. It seems to happen every winter, I turn around and two or three months have gone by, just like that. I didn't create anything for the 2nd challenge, Blue, and then I'd been wanting to get a hand-sewn curtain-along robe anglaise off of my sewing pile, plus the con I needed my Tauriel cosplay for was coming up really quickly, so I'd mostly just been letting myself work without the pressure of keeping up with posting. But I still reading my blogroll daily! I've been keeping on all of your fabulous creations, and y'all are just so inspiring :)

I had no idea what I was going to make for the third challenge, Stashbusting. My stash is relatively small but it's still pretty substantial. I'm wanting to get it organized, but that will have to wait for awhile yet. I need more space and/or different storage options to get through it.

Then I realized that I'd already made something that would work! Hooray! I'm sorry this post is so late, and that I don't have more pictures to go with it. I'll do a post on just the details in the future, promise :3


Nicole and myself at the ball. Photo by Janine Rose Photography.

There was a ball scheduled for February 28th. I had decided not to make anything new under pressure as I already had 2 gowns I'd made in 2013 that haven't even been worn yet. But then...

Timeline:

February 25th: See a lovely red gown that appears to have been made from a sari. Think, wait, I have a sari in my stash... Pull it out, work out a cutting layout, start cutting the sari into sections, cut the bodice, cut off one the bands from the skirt section. Pull out lining material to press it, run out of energy.

February 26th: run some errands, no sewing.

February 27th: Press lining fabric, cut out, start work on the bodice. Cut out sleeves. Go to bed.

February 28th: Wake up ridiculously early. 7-10am, work on bodice sleeves and bands, add buttonholes, prepare skirt. 10am-1pm, dance class. 1-2:30pm, make and attach skirt. 2:30-3pm, eat lunch. 3pm, go to Nicole's house to finish preparing. 3:30-7pm: attach buttons, make 3 reticules, get ready, leave for ball. 8pm: arrive really really late. Have a great night anyway.

It was a few weeks later, when I saw another participant's entry and the added "Stashed for?" line for this challenge that I realized that this dress COMPLETELY counts. I've had the sari for a long time, and the buttons used to close it are "vintage" (I've had them for 15 years, I have no idea how long they'd been stashed before that). Even though the lining fabric is relatively new, having been purchased in September, it was really my only option, as most of my stash is in various shades of blue or green, and I had purchased it without another project in mind.

This fabric has been in my stash for nearly 10 years, and has finally found it's purpose. And I am THRILLED, because it looked AWESOME. I cut the bodice with the crossed edge along the border, used one border from the skirt as the hem, and cut the other one off to use as bands for the bodice and sleeves. I am SO pleased with how this came out, and having a new dress for the ball was also excellent :D

The Challenge: #3: Stashbusting
Fabric: polyester sari (approx 5m long, still have the heavily decorated end and some short pieces), cotton sheeting for lining
Stashed for?: Sari 9.5 years, lining 6 months, buttons unknown (at least 15 years)
Pattern: La Mode Bagatelle cross-over dress, Sense and Sensibility sleeves
Year: 1810s-ish
Notions: 4 vintage buttons, thread
How historically accurate is it?: the overall look is pretty good, but that's about it lol
Hours to complete: 6-8
First worn: February 28th
Total cost: $4 (lining material purchased at $0.99/m)

Tuesday, April 21, 2015

Adventures in: Cosplay! (Part 3) Tauriel of Mirkwood (The Hobbit)

Hello friends! I have not been entirely idle while I've been quiet :3

Cosplay adventures! Part 3? Where are Parts 1 and 2, you might be asking. I haven't posted about either one yet... namely lacking pictures. Part 1 was started around this time last year, when I was watching an anime series and a friend and I decided to cosplay from it. I hope to have good pictures of that one soon. Part 2 was in April, when I made a Game of Thrones whore-I-mean-handmaiden dress to wear to the comic expo.

This year, after watching the third Hobbit movie for the second time, I was suddenly consumed with the desire to cosplay as Tauriel. It took me over a year to figure out how I felt about her as a character. At first I wasn't sure, knowing that she was not part of the original canon. I had to let the movie adaptations go, since extending it into 3 movies to start with was making them much longer than the book ever was (I think I could read the book in the same amount of time as it would take to watch the movies back to back, actually), and characters like Legolas never appeared in the text... I never really liked Legolas in the LOTR movies, but I really liked him in these ones. (I can already hear the shocked cries of "never liked Legolas? What??" Ladies, I would like to point your attention towards Aragorn.)

It hit me rather suddenly as we watched the movie that Tauriel is really an awesome character. In this day and age of rallying cries of equality, having a female character included was quite a nice thing for Jackson to do. Having a female character included who was not sexualized in any way, who had a role that is so very very often given to males, and she is darned good at that role too (are you going to mess with a woman who carries two knives and a bow? You're braver than I if you do). At the same time, she is allowed to be feminine and vulnerable and she is not shamed for this in any way by other characters. I actually fell in love with her when I realized that she got to wear sensible shoes. The only heel on her boots is one suitable for riding.

So. Refreshing.

I walked out of the theatre processing all I'd learned, determined to create a cosplay. I'd started analyzing the costume mid-way through, and already had a rough idea of what I wanted to look for and what I would do construction-wise. I spent several hours on the weekend staring at pictures and screencaps and flipping through the second movie frame by frame. I even went to the fabric store to scout out their stock, though I didn't buy anything (mid-day Sunday just is not the time to shop for me). I went back Tuesday night to take advantage of the current sale and pick up the fabrics I'd chosen. I even got fabric for making pants, which I hadn't intended to do. I couldn't find raw silk, of course, the one time I really wanted it I couldn't get it, but I have lots of time before I need it. I don't even REALLY need it, there are plenty of visuals of the costume without the outer robe.

Well, I picked up all of those fabrics in February, and then sat on the costume for most of two months. I wanted to have a perfectly fitted bodice, so I used a Truly Victorian pattern and cut off at the waist. For some reason these pieces all have removable skirts, which from a practical point of view makes zero sense (you aren't going to stop in the middle of a battle if your skirt starts to fall off...), and used some decorative stitching on my machine to recreate the look of the piped seams on the original costume. I used the sleeve of a modern pattern that fits closely but had to remove a couple of inches out of the head to get it to fit into the armholes properly. The skirt is a couple of trapezoids sewn for a few inches at the top and hemmed. I safety pinned it to the jacket upon wearing it to make sure it didn't slip down beyond the edge of the jacket.

I definitely need to make some changes. I sewed some pre-eyeleted tape to the front as closures but it gaped and wrinkled pretty bad. The skirt pulls away from my waist and flares down, when it should at least give the appearance of closing all the way down the front. I think I need to line it and weight them hem as well, but it's hard to say for sure. I didn't make the pants I wanted to and it was so cold the day I wore it that I had to wear a full-length cloak on top of it most of the day. I'd also forgotten a proper undershirt and made-do with a cream camisole... It was a bit of a disaster.

But. My wig is beautiful, and I got a photo with Graham McTavish, who plays Dwalin in the Hobbit movies and Dougal McKenzie in Outlander, and he is just a wonderful person. I also picked up an autograph for my aunt, who requested that I give him a kiss. I didn't expect anything when I told him that I was supposed to deliver said kiss, but he was so very very kind to allow me to kiss his cheek. My aunt was over the moon when I told her about it :)

And of course, I need to get to work on the rest of the pieces, including the props! I have plans to wear this again in September, but I should start soon :) I don't want to have any last-minute pre-event sewing this year!

This is literally the only photo I have of the outfit. I want the costume to be more ready for photographs before I take some proper ones.

Myself and Graham McTavish


Monday, January 19, 2015

HSM'15: #1: Foundations: A Corded Petticoat

I'm not really sure why I decided to make a corded petticoat. Three or four weeks ago, I might have been able to articulate it, but now, I don't remember. I guess I'd seen a few around the internet, and I loved the shape they give, so soft and lovely. And really, easier to store than a set of hoops.

So, after a bunch of research, I pulled out some fabric and random acrylic yarn and got to work. I would have preferred cotton yarn, but I'm still trying to sort my finances out after purchasing the car, and non-essential purchases are pretty much off the table for now (this will also make this session of belly dance classes very interesting since we're doing prop-work :D). But that's exciting in its own way, using only things I have on hand. We'll see how creative I manage to get with what I have :D


Front, over the 18th century bum roll.

At any rate, I had my heart set on a corded petticoat for the first HSM challenge this year. I googled "corded petticoat", which brings up lots of images, a few originals and lots of reproductions. There's a guide on ElizabethanCostuming.net, and I was completely inspired by Gina's lovely example, and it served as the basis of my "pattern".


Back, over the bum roll.

The petticoat is just two widths of fabric sewn together at the selvedges. I measured it to a finished length of about 30", with the length of the corded panel about 18". Some of the panel length was lost to off-grain fabric and of course the cording itself. The final length of the cording is 14.5", and there are 39 rows.

I debated for a couple of hours about whether to add another panel to keep cording, but then I found a list on Jennifer Rosburgh's old site with a chart of extant petticoats and the various lengths, widths, and rows of cording. I decided that 39 rows in 14.5" was plenty, and I could attach the waistband. I can always add the extra panel and more cording in the future if I decide to.

I'd also decided that I would starch the petticoat if I needed to. It was hard to judge how well the acrylic yarn would work out when the petticoat was a giant flat panel, but once I had the waistband on and could see how it looked, I was both startled and thrilled. It looked AWESOME! The cording providing so much stiffness and floof. I currently only have other time periods for undergarments, so it's shown here over an 18th century bum roll, an 1880s petticoat and an 1870s skirt.


Front, with bum roll, 1880s petticoat, and 1870s underskirt.


Back, with bum roll, 1880s petticoat, and 1870s underskirt.

I currently have it on Josephine (the dress mannequin) without the bum roll, but still in the skirts, which have a lovely A-line shape. I am just thrilled that it's done and how wonderful it looks, even without extra floof and no starching. Thrilled!

The Challenge: #1 Foundations
Fabric: poly-cotton broadcloth, acrylic yarn
Pattern: gleaned from the internet
Year: mid-1800s
Notions: a looooot of thread (I went through three bobbins-full)
How historically accurate is it?: The shape is wonderful! The materials are not accurate at all.
Hours to complete: SOOOOO MANY. Each row took 10 minutes, x39 rows... probably 8 hours of straight work.
First worn: Not yet.
Total cost: Free-to-me (all stash and also gifted items), but new materials would run in the $25 range

Sunday, January 18, 2015

HSF '14: #21: Re-Do: Tri-colour Knitted Sontag

I kind of really love the Re-Do challenges. They give me a chance to look back on what I've done and be re-inspired by previous challenges. Sometimes, quite literally.

I decided to Re-Do the Inspiration challenge -- Or rather, I started making something, and then realized that it was perfect for the Inspiration challenge, because the item I was making was inspired by another participant's item.


I'd never heard of a sontag (or bosom-friend) before, but it was so intriguing when Danielle of Stepping Into History posted hers for the HSF '13: Outerwear challenge. What a strange and interesting item! The pattern seemed easy enough, but I hadn't given it much serious thought until this past month or so. My cousin and I want to meet up some time soon and flounce around the mountains of British Columbia in Civil War-era gowns, and since I live in a place where winter can last 6 months and the air sometimes hurts my face, a torso wrap seemed like an awfully good idea. So when I finished my Christmas knitting, I started on the sontag.

I hadn't planned on submitting it as a challenge item at first, of course, until I remembered the moment when I first saw one. I don't think I ever would have made one without that inspiration, so it's only fitting that I should do so anyway. So I've Re-Do(ne) the Inspiration challenge: A knitted sontag.


I mashed up a couple of patterns, using the majority of instructions from this Peterson's 1862 Magazine as the basis. And for one of the first times ever, I kept detailed notes from when I started, partially because the instructions seemed awfully vague. These historic patterns were of course written in a time of different language patterns and when a person might reasonably be expected to know what the directions meant.

I started with 232 grams (including the bag and wrapper) of a 454 gram ball of Red Heart Comfort acrylic worsted-weight yarn. I used 5mm (US Size 8) needles, partly because that's what I have multiple needles, especially cabled needles, of, and thus that's what I had in my knitting bag the day I started. Now I'm going to get a bit confusing in measurements -- I also used about 4oz of copper worsted acrylic yarn. It was easier to read the ounces weight on my scale, whereas I weighed the blue on a postal meter, and the copper at home (lol). I also had roughly half of a 50g skein of white acrylic worsted yarn. I went with a dual-colour edging because the three colours are the same as the local hockey team's official colours (ahem, why no, I haven't been a fan since Gretzky played with them in the 80s... And also, the blue is not the same shade, but no one but us needs to know that, right?) I ended up with 51 grams of blue, and the leftovers of the white and copper barely weighed 4 grams together.

I did start with the Peterson's instructions, casting on 31 stitches. They go on to tell you to "widen and narrow" for one row, which the best approximation I could find was a Ravelry post that the poster took to mean yarn over and then knit 2 together, which would create a series of holes along the bottom. I quite like this design element as it leave a space for the waist cord to be threaded through. Doing this somehow created an extra stitch too, which made a great base for the pattern. I did like the row of purling every fifth row, sometimes I needed it to remember where I was in the pattern.


Perhaps a different weight of yarn and smaller needles would change the size somewhat, but I went with the Godey's instructions of widening the body every row until I had 18 blocks before separating one side, binding off the middle, and continuing with the other side. I went back to the Peterson's instructions then, narrowing every other row when I started the row on the inside edge. At first I worried this wouldn't narrow the "wings" fast enough, but they turned out fine. You need fairly long wings to wrap over the shoulder and around the body anyway. I went with a crocheted border instead of a knitted one, and then made some twisted ties and tassels. The result is a delightfully warm bosom friend :)


The Challenge: #21 Re-do (re-did #19 Inspiration)
Fabric: 100% Acrylic yarn
Pattern: A mash-up of Peterson's and Godey's magazines
Year: 1860-1862
Notions: a button for the back (not attached yet)
How historically accurate is it?: Pattern is 100% authentic! Acrylic yarn most certainly is not.
Hours to complete: 30 or so
First worn: Not yet
Total cost: new yarn would run $8-$16, but it all came from stash, so free-to-me

Thursday, January 1, 2015

HSF (now M) 15: Another Year of Fun!


There was some uncertainty regarding the future of the HSF. If organizing a world-wide sewing challenge is anything like trying to organize a world-wide writing challenge, I can defintely appreciate the amount of time and work that goes into it! I've never organized a world-wide anything, but the writing challenge I have done on a local scale, and it's honestly exhausting, even with helpers. While I love participating, I would wholeheartedly support whatever decision was made.

So I was super happy when it was announced that the challenge would continue, but much scaled-back to monthly challenges. Perfect! My very first thought after "yay!" was "maybe I will actually finish all of the challenges this year, AND all the ones I missed for the last two years".

I do so love making things hard on myself by being ambitious.

I have piles of plans for the last two years, and the upcoming challenges are starting to take form too. So, here is my current list of Things To Do!

2015

January: Underthings: A corded petticoat. I've already started it :D
February: Colour Challenge: Blue: Unplanned, but a good 50% of my stash is blue so this should be easy
March: Stashbusting: While I don't have a lot of trims, I have LOTS of stashed items. Another easy challenge.
April: War & Peace: This one will require some thought...
May: Practicality: Right now I'm wanting some nice around-the-house items, like a skirt and bedgown, or maybe a house-dress.
June: Out of Your Comfort Zone: Maybe something 1830s? Those huge sleeves sure are intimidating!
July: Accessorize: Currently planning to start a knitted sontag/bosom buddy in the very near future. I might have it done by July lol
August: Heirlooms & Heritage: Not sure yet.
September: Colour Challenge: Brown: the other half of my stash is brown. Yay!
October: Sewing Secrets: planning either a false-fronted Victorian bodice, and/or a watch pocket. Yay!
November: Silver Screen: Can we say "proper 1893 Doctor Who"? I think we can.
December: Re-Do

2014

#8: UFOs & PHDs: I... didn't do this one? I have an entire box for UFOs...
#10: Art: make that black hat, fichu, apron and mitts, and trim my gown.
#11: Politics of Fashion: Finish that chemise a la reine!
#17: Yellow: Finish the riding habit vest
#18: Poetry in Motion: A green kirtle inspired by Tam Lin
#20: Alternate Universe: I can't remember if I even had a plan for this one.
#21: Re-Do: AHAHA Oh so many choices!
#22: Fortnightlier's Choice: Gentlemen: A habit-shirt.
#24: All That Glitters: I don't have a plan at all!

2013

#0: Starting Simple: Maybe a reticule?
#1: Bi/Tri/Quadri/Quin/Sex/Septi/Octo/Nona/Centennial: A 1913 corset
#4: Embellish: I'd like to try my hand at embroidery :D
#5: Peasants & Pioneers: I still think I'd like to do a simple Victorian-era outfit for the pioneers that settled around here mid-century
#8: By the Sea: Still planning that fabulous Edwardian gown
#9: Flora and Fauna: my curtain-along gown! It is awaiting sleeves and hemming :D
#11: Squares, Rectangles & Triangles: Options, options...
#12: Pretty Pretty Princesses: This one is really special to me still. I'm thinking a ballgown in a lovely shade of blue.
#13: Lace and Lacing: Moar corsetry! (Perhaps some half-boned or late 18th-century stays)
#14: Eastern Influence: Options, options...
#15: Colour Challenge White: Regency gown made from IKEA curtains.
#16: Separates: Still want to make a bodice to mis-match a skirt I already have :)
#17: Robes & Robings: Let's make this extra challenging and do a robe a transformation :D
#18: Re-make, Re-use & Re-fashion: Need to decide what to do with the dress I took apart for this challenge.
#19: Wood, Metal, Bone: Still no idea D:
#20: Outerwear: A Victorian coat!
#21: Colour Challenge Green: an 18th century jacket
#22: Masquerade: No idea :(
#26: Celebrate: Also no idea :(((

1770's Riding Habit

I'm not precisely sure when I decided that I needed a riding habit, but once the idea was there, it needed to happen. It's been on ...